Started Cowl Baffle (Section 47)

Screen Shot 2020-06-13 at 6.34.10 PM


Picked, Inspected, and deburred all of the cowl parts.


Trimmed and deburred the cylinder baffle doublers and riveted to the cylinder baffles.


Installed nut plates and oil cooler flange and assembled aft baffles. Added strips of RTV to the mating surfaces.


Trimmed the air cleaner frame, added nut plates and fit to the inlet ramp. Assembled the left inlet ramp.


Attached the SCAT tube flange and screen for the heater air inlet to the right inlet ramp. Assembled the right inlet ramp. Added RTV strips to the mating surfaces of the inlet ramps.


Today’s Time (hours): 8.0
Finish kit (hours): 285.0
Total Time (hours): 1019.0

Completed the prop and spinner

Went flying with Jared, Wes, and Scott. Got some nice pics of Wes’s RV-7A in fingertip formation on the way to KLZU for dinner Thursday evening.

img_4758


Jared came over on Friday and helped me hang the prop. Leveraged my specialization in brute force and stupidity to turn a one hour job into a five hour epic involving a three hour journey to and from Aircraft Spruce for a new prop wrench. All’s well that ends well.

img_4776


Safety-wired  the prop mounting bolts.

img_4780


Mounted and drilled the spinner, spinner plate and forward bulkhead. Used the neodymium magnets and plastic washers that came with the kit to locate the holes in the forward bulkhead.


Installed nutplates into the bulkhead and re-mounted it. Torqued and safety-wired the bolts.


Fabricated and installed the gap fillers. Clamped a couple of wooden boards to the prop blade as a lever to rotate the blades (change their pitch) in order to check the clearance of the spinner and gap filler. I used a sanding drum in an electric drill to make minor adjustments to the spinner and gap fillers. Then riveted the gap filler to the spinner plate.


Reinstalled the spinner.


Today’s Time (hours): 10.0
Finish kit (hours): 241.0
Total Time (hours): 975.0

Started the Seat Backs (Section 39)

Screen Shot 2020-02-09 at 5.14.16 PM


Picked and inspected all the parts. Peeled off all the blue vinyl and labels.


Cut the corners off the seat back angles.

img_4275


Separated the parts that needed parting. Deburred everything.


Fabricated the seat back and seat brace hinges. Match drilled the hinges to their corresponding parts. Machine countersunk the brace stiffeners and braces. Riveted the brace assemblies together.


Riveted together the seat backs.

img_4288


I’ll scuff and paint these along with the canopy.


Today’s Time (hours): 4.0
Finish Kit (hours): 51.0
Total Time (hours): 781.0


Started assembling canopy frame

Riveted together the canopy handle and aft canopy frame.


Machine countersunk the side rails forward rails. Dimpled the side skins, the forward top skin, and the support flanges.


Clecoed the skins and forward rails to the substructure and reinstalled the forward and mid fixtures to the bottom.

img_4234


Today’s Time (hours): 2.0
Finish Kit (hours): 35.0
Total Time (hours): 765.0


Work on canopy frame continues

Riveted the rail bases to the forward canopy frames. Clecoed the skins and splice plates to the frame along with the rails. Clecoed the forward and aft fixtures to the bottom of the forward canopy frame.  Carefully leveled everything and checked for twist in the structure. Rolled a curve into each end of the canopy frame closeout and clecoed it in place. Match/final drilled the closeout.


Machine countersunk the aft ends of the canopy rail flanges. Fluted the canopy rail angles and match/final drilled. These are thick aluminum. Glad I ate my Wheaties this morning. Machine countersunk the holes in the bottom of the angles. Then riveted the flanges to the angles. The plans called for dome head rivets with the shop heads set into the countersinks on the bottoms of the angles achieving a near-flush shop head.


Bent aft half of the rails to match the curve of the fuselage. Match/final drilled the rails to the angles. You’ll note the tape on the clecos. The plans have you cleco everything together through the matched holes. Then add clecos as you match drill each additional holes. Then go back and remove the original clecos and final drill those holes. So the tape was a reminder as to which were the original clecos. Machine countersunk the holes in the rails called out in the plans and riveted the rails to the angles.


Clecoed and final drilled the skins to the rails. Match drilled the canopy handle to the assembly as well.

img_4207-1


Clecoed the the rail assemblies to the forward canopy frame assembly and final drilled.

img_4208-1


Disassembled everything.

img_4209


My Back-ordered nose gear leg showed up today. Still waiting on the mains. Fedex delivered package 2 of 2 but not 1 of 2. Hopefully it will show up tomorrow. Fedex tracking says it’s in Forest Park. Not sure why given that it was in Kennesaw with the other package last night.

img_4195


Today’s Time (hours): 6.5
Finish Kit (hours): 33.0
Total Time (hours): 763.0


Cut, deburred, scuffed, and primed the canopy frame parts.

Cut all the parts that needed parting.


Fabricated the canopy handles from aluminum angle.

img_4181


Deburred and scuffed all the parts.

img_4184


Primed everything.


Started assembling the canopy frame. Dimpled and rivered the hinge intercostals. Dimpled the skin. Fluted and fit the substructure. Started riveting the substructure together.


Today’s Time (hours): 6.0
Finish Kit (hours): 26.5
Total Time (hours): 756.5


Cut the pilot-side instrument panel

I used the fly cutter in the drill press to cut the round hole for the G5, I drilled small pilot holes for all the switches and the corners of the GDU 460 cutout. I final drilled all the holes with a step drill. Then cut the hole for the GDU with a Dremel and a cut-off wheel. Actually went through several cut-off wheels. That’s some thick aluminum. Used a file to clean everything up and tweak to fit. Then I painted the back to match the interior. I screwed the G5 mount in place. I drilled the screw holes for the GDU mounting bracket. Then screwed it to the firewall and match drilled the rivet holes, counter sunk the holes and riveted the bracket to the panel.


Mounted all the avionics and switches in the panel and mounted the panel in the plane.

img_4038


Today’s Time (hours): 4.0
Options and Miscellanea Time (hours): 22.0
Total Time (hours): 705.0


Started mounting avionics

Made some trial panels from plastic. I’ll use these to lay out the panel and make sure everything fits before I start cutting metal. I’f I do this properly and everything works out, I should be able to use these as templates to lay out the actual metal panels.

img_4011


Temporarily mounted the GAD27 (ARINC), GAD29 (electrical device controller), and GEA 24 engine indication system. I mounted the GEA 24 directly to the sub panel. I made a stand-off mount for the GAD 27 using some aluminum sheet and some aluminum tubing. This let me “stack” the two boxes fore and aft. This was the same approach that Jared took in his plane. So I can’t claim credit. I also mounted the TCW integrated backup battery system. I fit the boxes, drilled the sub panel, and attached the boxes with temporary hardware I had lying around. I’ll get the proper hardware this week.


I fabricate a doubler to mount the WaaS GPS antenna. I cut a piece of aluminum to sive, laid out the holes for the antenna and rivets. I match drilled the empennage top skin to the doubler. I dimpled the doubler, riveted nut plates to it, and primed with SEM rattle can. I dimpled the top skin with the pop rivet dimple dies. I riveted the doubler to the inside of the skin and screwed the antenna in place with the supplied hardware.


Started fitting the radio stack. I used a digital level and shimmed up the front of the radios so that the were perpendicular to the panel. Determined that I need to enlarge the center opening in the sub panel in order to accommodate the radios without blocking the canopy release. Even then, everything barely fits.

I picked up a vibratory cutter and a flush cutting blade. I’ll use this to cut the sub panel tomorrow.


Today’s Time (hours): 6.0
Options and Miscellanea Time (hours): 7.0
Total Time (hours): 682.5


So close!

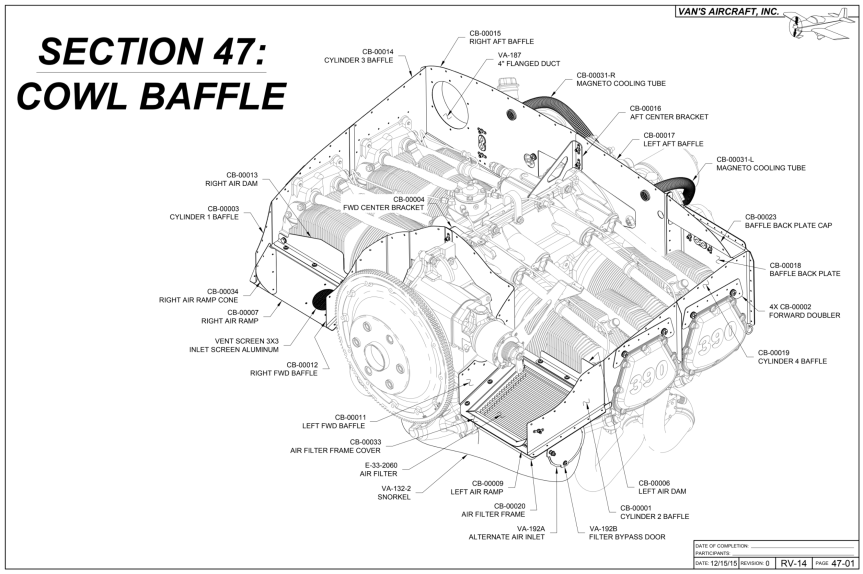
Today was a bit of a shit show. Last night I worked on the roll bar after a fun day of flying with Jared, Wes, and Scott. Realized that I didn’t have enough AN426AD4-5 rivets to complete the roll bar. So I put in an order with spruce. I need a bunch of stuff anyway.  Drove down there this morning and picked everything up. So far so good.

Here’s a picture of Wes’ beautiful RV-7 on the way back from NC yesterday.

img_3973


Last night I riveted the brackets to the roll bar brace. I temporarily mounted the left and right forward roll bar parts to the fuselage as a jig to rivet the splice plate. Then did the same for the aft half of the roll bar. Then I clecoed the forward and aft halves together with the inboard and outboard straps and window shims and final drilled everything. I deburred all the parts and countersunk the ones that needed countersinking. I riveted the forward roll bar assembly to the inboard strap with the AN470 rivets called out in the plans. That’s when I realized that I didn’t have enough AN426AD4-3 rivets to do the next step which was to rivet the outboard strap.


Segue to today… Went to Spruce. Got the rivets and a bunch of other goodies… Ignition switch and toggle switches. Then back to work… I riveted the outboard strap to the forward roll bar assembly. I joined it up with the aft half and used the LP and CS blind rivets to assemble the whole thing. I also riveted the bushings and doubles in place on the aft sections.


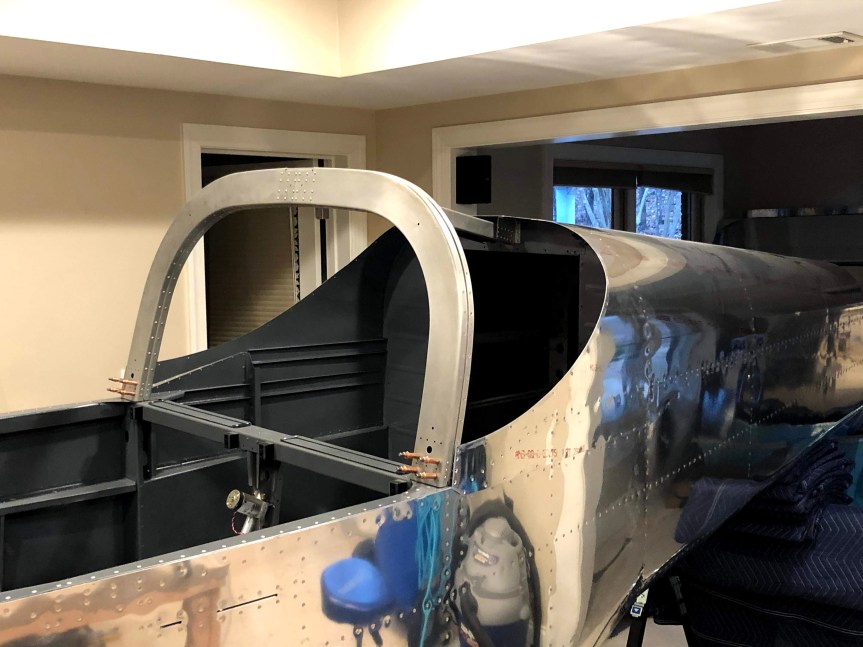
And then… Disaster! The little arrow in the picture is pointing the wrong way. I misread the plans last night. I had to drill out three quarters of the hundred or so rivets holding this whole thing together so that I could reorient the outboard strap to face the proper direction to properly mate to the roll bar brace. I lost about 2.5 hours to this. Plus a lot of frustration. Stupid mistake.

img_3988


Once I got through reassembling the roll bar, I was able to mount it on the fuselage and match drill the bases and get everything riveted in place. But to add insult to injury, I’m now short a number of CS4-4 and LP4-3 rivets due to the error. So I can’t actually finish the section. But I did get as far as I could and placed an order with Vans for the rivets. There’s only about half an hour of work to finish it up once I have the rivets.   I’ll move on to something else but it sure would have been nice to have been able to paint it up this weekend and call the Fuselage complete.

img_3990


Today’s Time (hours): 6.0
Fuselage Time (hours): 221.0
Total Time (hours): 676.5


Primed the control system parts and began assembly

Primed all the parts.

img_3948


Bolted the elevator idle arm in place.

img_3949


Assemble the stick link pushrod.

img_3950


Riveted the elevator pushrod ends into the rods and added the rod end bearings.


Bolted the forward push tube to the control column.

img_3954


Put together the elevator bell crank assembly. riveted the bell crank halves together with the flange bearing in the middle. Machine countersunk the the nut plate holes in the bell crank bracket and riveted in the nut plates. Bolted the bell crank angles to the bell crank and then to the bell crank bracket. Machine countersunk and riveted together the yaw servo bracket. The match drilled it to the the fuselage and installed the bell crank assembly together with the mid elevator push tube, pitch servo bracket, and yaw servo bracket.


Connected the forward and mid push tubes to the idler arm.

img_3961


Final rilled the control stick bases to the control sticks. The installed the bases into the control column. Bolted the stick link to the right hand stick base. I’ll bolt up the other side after I’ve checked the alignment of the sticks.

img_3962


Today’s Time (hours): 6.0
Fuselage Time (hours): 214.0
Total Time (hours): 669.5