
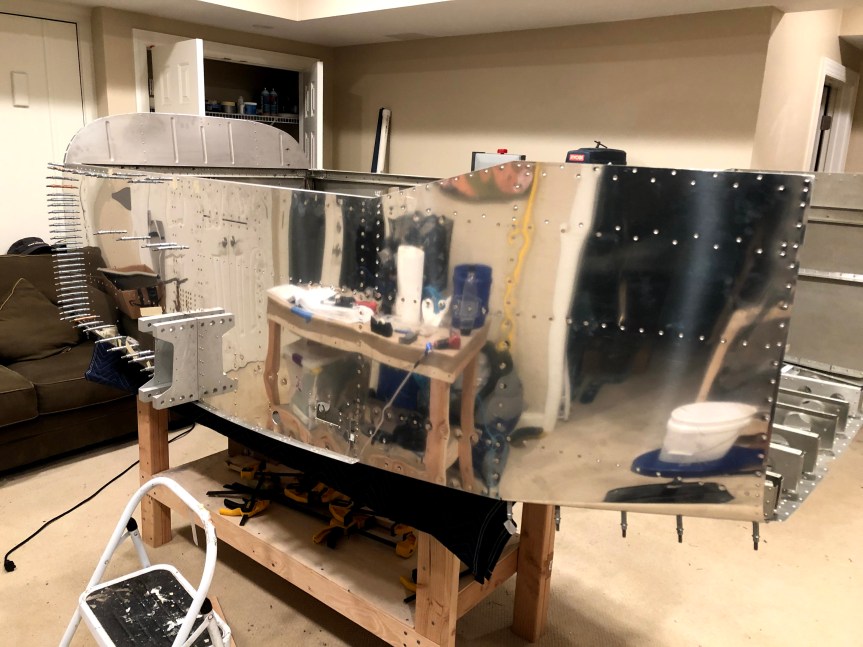
Finished sealing the forward skin and seal angles.


Masked off and painted the right fresh air duct and skin.

| Today’s Time (hours): | 1.0 |
| Fuselage Time (hours): | 206.0 |
| Total Time (hours): | 660.5 |

Finished sealing the forward skin and seal angles.
Masked off and painted the right fresh air duct and skin.
| Today’s Time (hours): | 1.0 |
| Fuselage Time (hours): | 206.0 |
| Total Time (hours): | 660.5 |
Ran a fillet of sealant along the intersection of the skin that the fire wall as well as the skin and the sub-panel. Once it sets up, I’ll finish it with a bead on along the seal angles.

When I painted the interior, I left a section unpainted to seal the vents to the side skin. Today I masked off and painted the left one. I’ll get the right one next time I flip the fuselage over onto its right side.


| Today’s Time (hours): | 2.0 |
| Fuselage Time (hours): | 202.0 |
| Total Time (hours): | 656.5 |
Finished riveting the skin and hinges. Just need to seal everything up with some tank sealant and that will complete the section.

| Today’s Time (hours): | 2.0 |
| Fuselage Time (hours): | 200.0 |
| Total Time (hours): | 654.5 |
Sealed and riveted the top skin center section in place leaving the sides free to provide access to install the canopy hinges and release mechanism.


Installed the canopy hinges and canopy cradles and connected up the gas springs.

Installed the canopy release mechanism.

| Today’s Time (hours): | 3.0 |
| Fuselage Time (hours): | 198.0 |
| Total Time (hours): | 652.5 |
I assembled the fresh air vents by sealing the vents to the ducts with silicone adhesive and then bolting them together with the mounting bracket. I then glued these assemblies in place on the side skins with tank sealant.


Assembled the canopy release mechanism. Used the jig that came with the kit to align everything and drilled the tube for the AN3 bolt. Then put everything together.

Machine countersunk the doublers and top skin for AN426AD2 rivets using a #34 drill bit. These suckers are teeny tiny. Double flush riveted the doublers to the forward top skin with the squeezer.


| Today’s Time (hours): | 2.0 |
| Fuselage Time (hours): | 193.0 |
| Total Time (hours): | 647.5 |
Laid a bead of tank sealant to fill the gap between the side skin, longeron, and canopy deck. Then I clecoed and riveted the canopy decks in place.


Riveted the wire supports to the bottoms of the panel standoffs.

Clecoed the panel in place. I couldn’t rivet it because I ran out of K1000-06 nut plates. Ordered from Spruce.


| Today’s Time (hours): | 2.0 |
| Fuselage Time (hours): | 191.0 |
| Total Time (hours): | 645.5 |
Took a break from riveting the the fuselage together. Jared’s lending me his engine-stand-fuselage-rotisserie. So I’ll wait until he drops by next weekend to finish the riveting. It’ll be a lot easier if we can roll the fuselage on its side.
So… Got started on the fuel system tonight. Picked and inspected all the parts.

Separated the fuel line brackets and riveted to the cover ribs.


Disassembled the fuel selector valve. Oriented the fittings per the plans but couldn’t screw them in because I didn’t have the Loctite 648 that the instructions called out. Ordered some from Amazon. I riveted nut plates to the flanges of the valve. Finally I machine countersunk the screw holes in the face plate.


Crimped the connectors on the leads from the fuel pump. Added thread sealant to the fuel filter fitting and screwed it into the pump. Mounted the pump and filter into the into the fuselage.


Attached the AN elbows to the firewall and fuselage sides.


| Today’s Time (hours): | 3.0 |
| Fuselage Time (hours): | 136.0 |
| Total Time (hours): | 590.5 |
Back riveted the side ribs, center section, and forward stiffener to the side skins.


Clecoed the side skin and longerons to the fuselage and bolted the upper drag link in place. I ran a bead of fuel tank sealant between the firewall and the skin and the upper longeron and the skin. Unfortunately it wasn’t until after I put the sealant in place that I realized that I hadn’t dimpled the flanges of the firewall. In my defense, I can’t find where it says to do so in the instructions. What a fucking mess! Thanks, Vans!


Riveted the canopy latch bracket and bulkhead side channel to the left skin.


Got about halfway through the riveting on the left side. Slow going. I was hoping to make more progress than I did today.
Ran into one frigging rivet that necessitated removal of the landing gear bracket. This was a huge pain in the ass with the skin in place. There’s not enough room to get a drift in front of the main bulkhead to knock the outboard bolt out. Ended up using the short end of an allen wrench and hitting it with the long bucking bar that I have. There wasn’t room for a hammer. Once I got it started with this arrangement, I was then able to get a drift into the space and use the bucking bar to knock the bolt out. Would have saved a bunch of time had I removed the bracket before the skins went on. Burned over an hour on this.


| Today’s Time (hours): | 10.0 |
| Fuselage Time (hours): | 115.0 |
| Total Time (hours): | 569.5 |
Constructed a support leg from scrap wood and bolted to the bulkheads. Then turned the fuselage assembly up on its side to rivet the bottom.


Put clecos in all holes to be riveted. The final drilled and blind riveted the bottom skins to the drag links. This is as far as I could get without a riveting partner.


Sealed the muffler ramp to the bottom skins with fuel tank sealant.

Dimpled and countersunk all of the parts except the skins.

Riveted the roll bar angles to the intercostal ribs.

Fabricated the seat adjustment guides and assembled the seat adjustment stuff to the cross brace.


| Today’s Time (hours): | 5.0 |
| Fuselage Time (hours): | 94.0 |
| Total Time (hours): | 548.5 |
Applied a bead of tank sealant to the bottom flanges of the muffler shroud sides and riveted them to the forward skins. Riveted the muffler shroud ramp to the sides and added a fillet of sealant to the bottom of each seam.


Positioned the firewall assembly on the forward skins and muffler shroud. Added sealant between the skins and firewall and around the curved area where the muffler shroud connects to the firewall and clecoed everything together. Riveted the cover bases to the skin. Riveted the curved part of the firewall to the muffler shroud sides and ramp.


Riveted the firewall angle to the firewall and skins. Dimpled the cowl places and shims and riveted them in place.


Riveted the tunnel sides to the skins and muffler shroud.


Riveted the routing bracket and fuel selector bracket in place.

Riveted and bolted to forward center section bulkhead to the tunnel side. Riveted the skins to the cover ribs.


Sealed and screwed the firewall penetration fittings to the firewall.

Fabricated and assembled the cabin heat vent assemblies. Then riveted them in place on the firewall along with their control cable brackets.


Machine countersunk the battery box attach holes and riveted it to the firewall.


Dimpled the cover panel and riveted it to the forward flanges of the cover ribs along with a gazillion nut plates.


Forward Fuselage Lower Structure… Done! On to the side structures!


| Today’s Time (hours): | 8.0 |
| Fuselage Time (hours): | 73.0 |
| Total Time (hours): | 527.5 |
