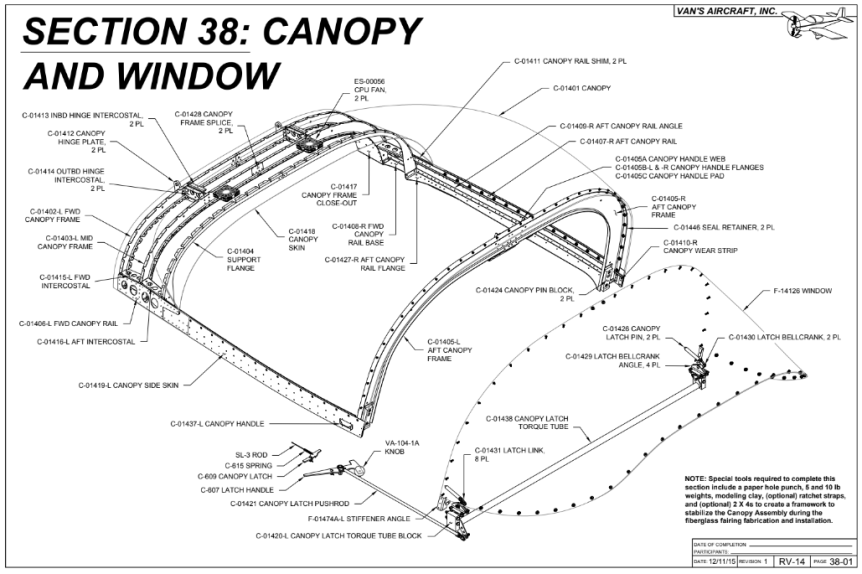
Work resumes on the canopy

Put the canopy back on the frame and clecoed in place. Peeled back the protective plastic on the forward edge of the canopy. Used a caliper to scribe a line for the aft of the fairing. Laid two layers of electrical tape along the line and put some masking tap above it to make sure the canopy is protected as I work on the fairing. I filed the outboard edge of the canopy to reduce the profile and make for a thinner fairing.


Fabricated a little 2″ straight edge tool and used it to scribe the forward fairing line into the top skin of the canopy frame. I cut out the side templates and used a sharpie to trace the forward outboard fairing line. It didn’t quite match up with the forward line I had scribed. So I split the difference and made a nice curve when I masked off the line with the electrical tape.


Scuffed the scrap out of the masked off skin and canopy with 60 grit sand paper. Went back and did another pass after these pics. It’s scuffed!


Arts and crafts time! I cut out the paper templates for the fiberglass cloth.

img_4329


Today’s Time (hours): 2.0
Finish Kit (hours): 62.0
Total Time (hours): 792.0


Cut, deburred, scuffed, and primed the canopy frame parts.

Cut all the parts that needed parting.


Fabricated the canopy handles from aluminum angle.

img_4181


Deburred and scuffed all the parts.

img_4184


Primed everything.


Started assembling the canopy frame. Dimpled and rivered the hinge intercostals. Dimpled the skin. Fluted and fit the substructure. Started riveting the substructure together.


Today’s Time (hours): 6.0
Finish Kit (hours): 26.5
Total Time (hours): 756.5


Began work on Canopy and Window (Section 38)

Screen Shot 2020-01-16 at 11.26.43 PM


I clamped the rear window in place and carefully adjusted until it was properly centered. I marked it for cutting. I cut the two notches for the roll bar brace brackets with the Dremel and a cutoff wheel. I cleaned it up a bit with files. I trimmed back the protective plastic and remounted and clamped in place. I had to trim a bit further to get the window flush with the window shim on the roll bar. I just filed it back a bit. Ready for drilling.


Today’s Time (hours): 3.0
Finish Kit (hours): 10.0
Total Time (hours): 740.0


Wiring Continues

Ran the right harness up to the co-pilot’s control stick. This required filing out a number of holes along the way to enable the connector to fit through.  I also ran the wires for the GPS, transponder, and com radio.


Today’s Time (hours): 3.0
Options and Miscellanea Time (hours): 44.0
Total Time (hours): 733.0


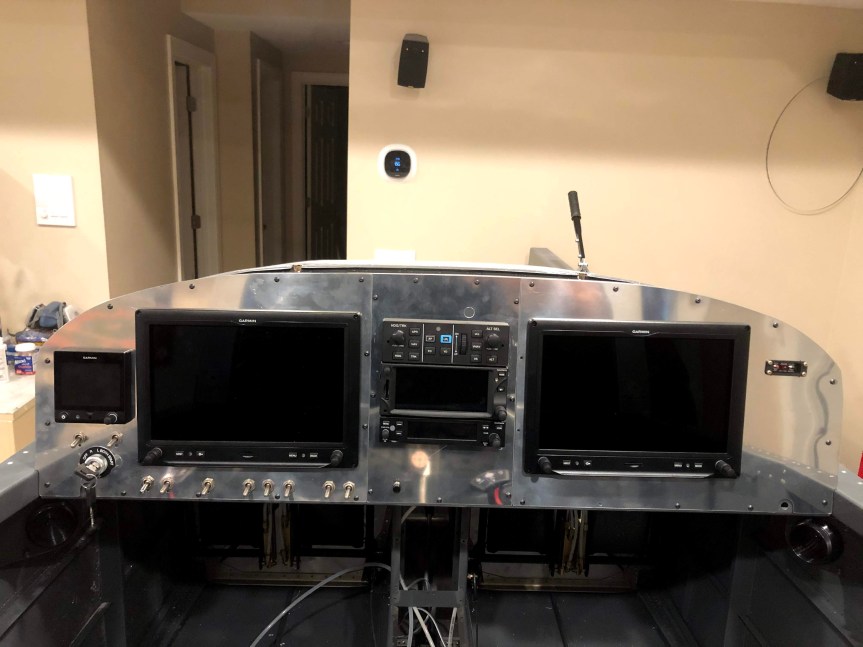
Cut the co-pilot-side panel

Same drill as the pilot side…  Lay everything out, drill pilot holes, final drill with step drill, cut with Dremel, deburr, machine countersink, paint, rivet, and bam! We have a panel.


Mounted the GDU and the ELT switches to the panel and mounted the panel in the plane.

img_4046


Next, I’m going to cover the panel in flat black vinyl. I’m also thinking about adding a carbon monoxide detector beneath the ELT buttons.

Today’s Time (hours): 3.0
Options and Miscellanea (hours): 25.0
Total Time (hours): 708.0


Dimpled the skins and countersunk the longerons

Taped off the holes that were not to be dimpled. Deburred and prepped the edges per the plans. Dimpled the skins.


Countersunk all the outboard holes in the upper and lower longerons.


Today’s Time (hours): 3.0
Fuselage Time (hours): 105.0
Total Time (hours): 559.5

Completed most of the fabrication steps

In case you haven’t noticed, I’ve settled into a strategy for most sections of the build… First I pick, inspect, and peel all the parts for the section. The I take a first pass through the instructions and perform all of the steps that require cutting, grinding, bending, etc. Then I deburr, scuff, and dimple all the parts. Then I prime everything. Finally I assemble and rivet everything. I’ve found this approach is much quicker then going step by step in the order of the instructions. I can set up the shop and tools for each operation and reorganize after each operation. I kind of get into a groove with each of the operations and avoid frequent tool changes. I also only need to set up for paint, which is a major operation, once per section.

Today I was focused on fabrication steps… I started with the upper longerons. I cut and trimmed according to the plans. The fabricated a couple of clamping blocks that allowed me to secure each longeron in the bench vise and clamp a lever to the end in order to bend a 10 degree twist into them. Finally I clamped and clecoed the upper engine mount brackets to the forward end of the longerons and match drilled them.


Drilled and cut the lower longerons and match drilled them to the lower engine mount brackets and longeron doublers.


Fabricated the hinges that will attach the cowling to the firewall.

img_3549


Separated a whole bunch of parts. Unfortunately my bandsaw blade gave up the ghost early on and I didn’t have a spare. So I used the snips for the thinner aluminum and the Dremel with a cutoff wheel for the thicker parts. A little bit slower but not too bad.

img_3550


I managed to lose a part somehow. I turned the shop upside down and couldn’t find the F-01422 Fuselage Side Ribs. I checked it off on the inventory. No idea what happened to it. Ordered a new one from Van’s.


Today’s Time (hours): 5.0
Fuselage Time (hours): 80.0
Total Time (hours): 534.5


Completed Right Wingtip

Laid out the cut the left and right wing tips. I made over-ran on of the cuts by an inch or so on the left wing. So I did a little patch and fill with some fiberglass and micro and set it aside to cure. Then continued work on the right wingtip.


Cut and installed the nav light lens.


Installed the nav/strobe light. Used the template from the plans to drill the wingtip. Terminated the wires with Molex .062 pins. Unfortunately Vans provided a 4-pin molex housing instead of the 5-pin one that matches the wiring harness in the wing. <sigh> Now I get to pay $10 in shipping for two $1 moles housings. Mounted the bracket and installed the light. Tested it out with a 9-volt. That sucker is bright!


Fit the wingtip to the wing and set it in place with a ratchet strap. Match drilled the holes from the wing skins to the wingtip. Final drilled and dimpled the holes in the wing for #6 screws. Final drilled the screw holes in the wing tip and then used a nut plate, a screw, and a cleco as a drill jig to drill the nut plate attach holes. Machine countersunk the screw and rivet holes and riveted the nut plates in place.


Fit the wing tip rib to the wingtip. Laid out and match drilled rivet holes. Riveted the rib in place.

img_3202


Bam! Right wingtip done.

img_3201


Today’s Time (hours): 8.0
Wing Time (hours): 293.0
Total Time (hours): 445.0


Back to work on the tanks

Got back from Toronto yesterday and my replacement tank skins had arrived. I cut the splice strips from the skins with the snips and filed/sanded the edges smooth. I clecoed the baffles into the skins and machine countersunk all the associated rivet holes.

I’ll get the dimpling done tomorrow and start assembly on Sunday.

In other news… Van’s charged my credit card for the balance due on the fuselage kit. Hopefully that means the kit is being crated and will ship in the next week or so. Now the pressure is on to finish the wings!

Today’s Time (hours): 1.0
Wing Time (hours): 190.0
Total Time (hours): 342.0