Started riveting the side skins to the fuselage

Back riveted the side ribs, center section, and forward stiffener to the side skins.


Clecoed the side skin and longerons to the fuselage and bolted the upper drag link in place. I ran a bead of fuel tank sealant between the firewall and the skin and the upper longeron and the skin. Unfortunately it wasn’t until after I put the sealant in place that I realized that I hadn’t dimpled the flanges of the firewall.  In my defense, I can’t find where it says to do so in the instructions. What a fucking mess!  Thanks, Vans!


Riveted the canopy latch bracket and bulkhead side channel to the left skin.


Got about halfway through the riveting on the left side. Slow going. I was hoping to make more progress than I did today.
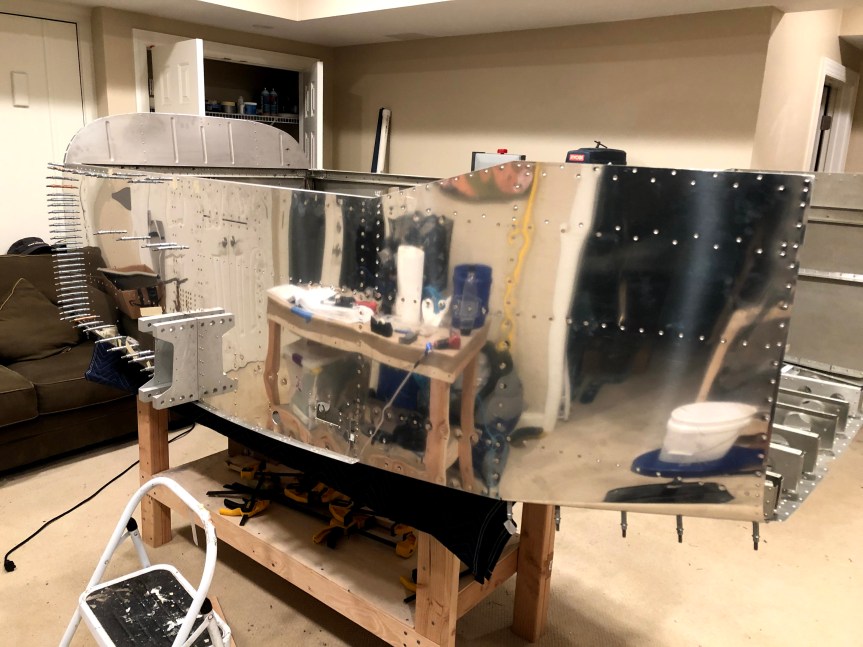
img_3677


Ran into one frigging rivet that necessitated removal of the landing gear bracket. This was a huge pain in the ass with the skin in place. There’s not enough room to get a drift in front of the main bulkhead to knock the outboard bolt out. Ended up using the short end of an allen wrench and hitting it with the long bucking bar that I have. There wasn’t room for a hammer. Once I got it started with this arrangement, I was then able to get a drift into the space and use the bucking bar to knock the bolt out. Would have saved a bunch of time had I removed the bracket before the skins went on. Burned over an hour on this.


Today’s Time (hours): 10.0
Fuselage Time (hours): 115.0
Total Time (hours): 569.5

Completed Forward Fuselage Lower Structure (Section 28)

Applied a bead of tank sealant to the bottom flanges of the muffler shroud sides and riveted them to the forward skins. Riveted the muffler shroud ramp to the sides and added a fillet of sealant to the bottom of each seam.


Positioned the firewall assembly on the forward skins and muffler shroud. Added sealant between the skins and firewall and around the curved area where the muffler shroud connects to the firewall and clecoed everything together. Riveted the cover bases to the skin. Riveted the curved part of the firewall to the muffler shroud sides and ramp.


Riveted the firewall angle to the firewall and skins. Dimpled the cowl places and shims and riveted them in place.


Riveted the tunnel sides to the skins and muffler shroud.


Riveted the routing bracket and fuel selector bracket in place.

img_3453


Riveted and bolted to forward center section bulkhead to the tunnel side. Riveted the skins to the cover ribs.


Sealed and screwed the firewall penetration fittings to the firewall.

img_3458


Fabricated and assembled the cabin heat vent assemblies. Then riveted them in place on the firewall along with their control cable brackets.


Machine countersunk the battery box attach holes and riveted it to the firewall.


Dimpled the cover panel and riveted it to the forward flanges of the cover ribs along with a gazillion nut plates.


Forward Fuselage Lower Structure… Done! On to the side structures!


Today’s Time (hours): 8.0
Fuselage Time (hours): 73.0
Total Time (hours): 527.5


Started assembling the lower skins and muffler shroud.

Dimpled the bottom skins and riveted the com antenna doublers and skin stiffeners to them. I’m only installing a single com radio so I only drilled out the right side skin for the antenna. The left side I installed some rivets to fill the starter holes. I did install the left side antenna doubler in case i want to add another radio later. I can just drill out the rivets and upsize the holes to install another antenna.


Dimpled the muffler shroud parts. Riveted the doublers and muffler hanger brackets to the shroud sides. Riveted the nut plates to the fuel pump brackets and then riveted the brackets to the shroud ramp.


Today’s Time (hours): 2.0
Fuselage Time (hours): 65.0
Total Time (hours): 519.5


Continued assembling the firewall

Riveted the angles and lower gusset to the right firewall side. Used tank sealant to Seal the top of the firewall to the sides and clecoed in place along with the top firewall angle and riveted them together. Clecoed the tunnel sides to the firewall assembly. Sealed the firewall center to the sides and top and clecoed in place. Clecoed the upper top angle and gussets in place. Final drilled the nose gear brackets.


Today’s Time (hours): 2.0
Fuselage Time (hours): 61.5
Total Time (hours): 516.0


Riveted the angles to the left firewall side

Received the new firewall angles from Van’s. Deburred, scuffed, and primed them. Then taped the holes I shouldn’t countersink and countersunk the rest.

img_3420


Clecoed the angles and gussets to the firewall. Then back-riveted the left firewall side.


Today’s Time (hours): 2.0
Fuselage Time (hours): 59.5
Total Time (hours): 514.0


Dimpled the bottom skin and riveted stuff to it.

Dimpled the bottom skin. Today’s word of the day: unwieldy.


Riveted the doublers and stiffeners to the bottom skin.


Dimpled the gear brace bracket and machine countersunk the gear brace bars. Riveted the gear brace assembly together and then riveted it to the skin.


Clamped the lower fuselage substructure to the bench and clecoed the skin to it. Ready for riveting.


Today’s Time (hours): 6.0
Fuselage Time (hours): 37.0
Total Time (hours): 491.5


Completed forward mid fuselage bulkheads (Section 25)

Received the new bulkhead bars from Van’s. Cut and deburred them. Scuffed them, Machine countersunk and riveted them. Reamed all the holes and bolted them to the aft bulkhead.


Today’s Time (hours): 2.0
Fuselage Time (hours): 22.0
Total Time (hours): 476.5


Recommenced fuel tank assembly

Jared came by again today to help out. Thanks, man. You’re the best!

We got the fuel drains, fuel filer and stiffeners re-installed.


Installed the ribs in the right tank.

img_2867


Made up installed the vent line for the right tank. Added installed the right tank attach bracket and aft inboard rib and filleted everything with sealer. Both tanks are now ready to be closed out with the rear baffle.

img_2868


I cannot over state what a sticky, smelly, messy process this is. My shop looks like a sealant bomb went off.  Every tool I own has some sealant on it now.


Today’s Time (hours): 10.0
Wing Time (hours): 222.0
Total Time (hours): 374.0


Ailerons are done!

Riveted bottom skin to the right spar and riveted the top and bottom main ribs together.

img_2802

Prepped the trailing edge extrusions and applied VHB tape to both sides. Clecoed in place and removed the backing. After the tape set up, I lightly set rivets with the squeezer then back riveted double flush.


Ailerons are complete. This completes all of the control surfaces on the airplane.


My replacement fuel tank skins should be here Thursday. Hoping to get the tanks assembled next weekend.


Today’s Time (hours): 3.0
Wing Time (hours): 189.0
Total Time (hours): 341.0