Continued assembly

Riveted the flange bearings to the control column.


Riveted the upper engine mounts to the upper longerons. Not sure why the Plans call out cherrymax rivets for some of the holes rather than solid rivets for all. Seems odd.


Riveted the engine mounts and doublers to the lower longerons. Same weirdness with the cherrymax rivets.

img_3587


Today’s Time (hours): 2.0
Fuselage Time (hours): 89.0
Total Time (hours): 543.5

Primed all the mid fuse side structure parts and began assembly

Primed all the mid fuse side structure parts.


Clecoed the mid fuselage to the forward fuselage section. Removed the bulkhead bars. Installed the angle fitting for the brake line into the landing gear brace with some thread sealant.  Bolted the lower drag fittings and gear braces to the fuselage structure. Bolted the upper drag fittings in place. Clecoed the center section side plates in place. Clamped the side plates to the upper drag fitting in preparation for drilling.


Mating up the forward and mid fuselage sections was pretty satisfying. Starting to look like something.


Today’s Time (hours): 3.0
Fuselage Time (hours): 87.0
Total Time (hours): 541.5

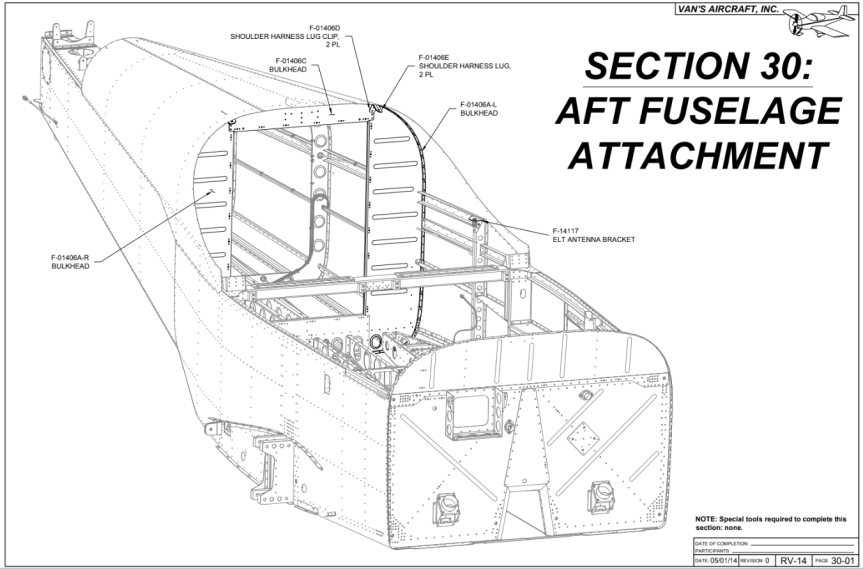
Began work on Aft Fuselage Attachment (section 30)

Screen Shot 2019-10-26 at 10.28.58 PM

This section only has a few parts and I was setting up to prime all the parts for section 29 so figured i’d get these while I was at it. Picked and inspected the parts. Cut apart the ones that needed to be separated on the band saw. Deburred all the edges. Scuffed and primed everything.


Today’s Time (hours): 1.0
Fuselage Time (hours): 84.0
Total Time (hours): 538.5

Completed most of the fabrication steps

In case you haven’t noticed, I’ve settled into a strategy for most sections of the build… First I pick, inspect, and peel all the parts for the section. The I take a first pass through the instructions and perform all of the steps that require cutting, grinding, bending, etc. Then I deburr, scuff, and dimple all the parts. Then I prime everything. Finally I assemble and rivet everything. I’ve found this approach is much quicker then going step by step in the order of the instructions. I can set up the shop and tools for each operation and reorganize after each operation. I kind of get into a groove with each of the operations and avoid frequent tool changes. I also only need to set up for paint, which is a major operation, once per section.

Today I was focused on fabrication steps… I started with the upper longerons. I cut and trimmed according to the plans. The fabricated a couple of clamping blocks that allowed me to secure each longeron in the bench vise and clamp a lever to the end in order to bend a 10 degree twist into them. Finally I clamped and clecoed the upper engine mount brackets to the forward end of the longerons and match drilled them.


Drilled and cut the lower longerons and match drilled them to the lower engine mount brackets and longeron doublers.


Fabricated the hinges that will attach the cowling to the firewall.

img_3549


Separated a whole bunch of parts. Unfortunately my bandsaw blade gave up the ghost early on and I didn’t have a spare. So I used the snips for the thinner aluminum and the Dremel with a cutoff wheel for the thicker parts. A little bit slower but not too bad.

img_3550


I managed to lose a part somehow. I turned the shop upside down and couldn’t find the F-01422 Fuselage Side Ribs. I checked it off on the inventory. No idea what happened to it. Ordered a new one from Van’s.


Today’s Time (hours): 5.0
Fuselage Time (hours): 80.0
Total Time (hours): 534.5


Completed Forward Fuselage Lower Structure (Section 28)

Applied a bead of tank sealant to the bottom flanges of the muffler shroud sides and riveted them to the forward skins. Riveted the muffler shroud ramp to the sides and added a fillet of sealant to the bottom of each seam.


Positioned the firewall assembly on the forward skins and muffler shroud. Added sealant between the skins and firewall and around the curved area where the muffler shroud connects to the firewall and clecoed everything together. Riveted the cover bases to the skin. Riveted the curved part of the firewall to the muffler shroud sides and ramp.


Riveted the firewall angle to the firewall and skins. Dimpled the cowl places and shims and riveted them in place.


Riveted the tunnel sides to the skins and muffler shroud.


Riveted the routing bracket and fuel selector bracket in place.

img_3453


Riveted and bolted to forward center section bulkhead to the tunnel side. Riveted the skins to the cover ribs.


Sealed and screwed the firewall penetration fittings to the firewall.

img_3458


Fabricated and assembled the cabin heat vent assemblies. Then riveted them in place on the firewall along with their control cable brackets.


Machine countersunk the battery box attach holes and riveted it to the firewall.


Dimpled the cover panel and riveted it to the forward flanges of the cover ribs along with a gazillion nut plates.


Forward Fuselage Lower Structure… Done! On to the side structures!


Today’s Time (hours): 8.0
Fuselage Time (hours): 73.0
Total Time (hours): 527.5


Started assembling the lower skins and muffler shroud.

Dimpled the bottom skins and riveted the com antenna doublers and skin stiffeners to them. I’m only installing a single com radio so I only drilled out the right side skin for the antenna. The left side I installed some rivets to fill the starter holes. I did install the left side antenna doubler in case i want to add another radio later. I can just drill out the rivets and upsize the holes to install another antenna.


Dimpled the muffler shroud parts. Riveted the doublers and muffler hanger brackets to the shroud sides. Riveted the nut plates to the fuel pump brackets and then riveted the brackets to the shroud ramp.


Today’s Time (hours): 2.0
Fuselage Time (hours): 65.0
Total Time (hours): 519.5