Fitting the flaps together

Assembled the inboard and outboard rod end ribs. Clecoed the ribs and doubles together. Match drilled the #40 holes and final drilled the 1/4″ hole. Countersunk the #40 holes on the outboard doublers.


Clecoed the ribs to the flap hinges and final drilled all the #30 holes.

IMG_2681


Modified all the main ribs by removing the top forward tab from each with the Dremel and a cutoff wheel. Finished with a bit of sanding to remove the burrs.

IMG_2683


Assembled the flap substructures.

IMG_2684


Trimmed the inboard and outboard trailing edges to final size with the bandsaw and finished on the scotch brite wheel.


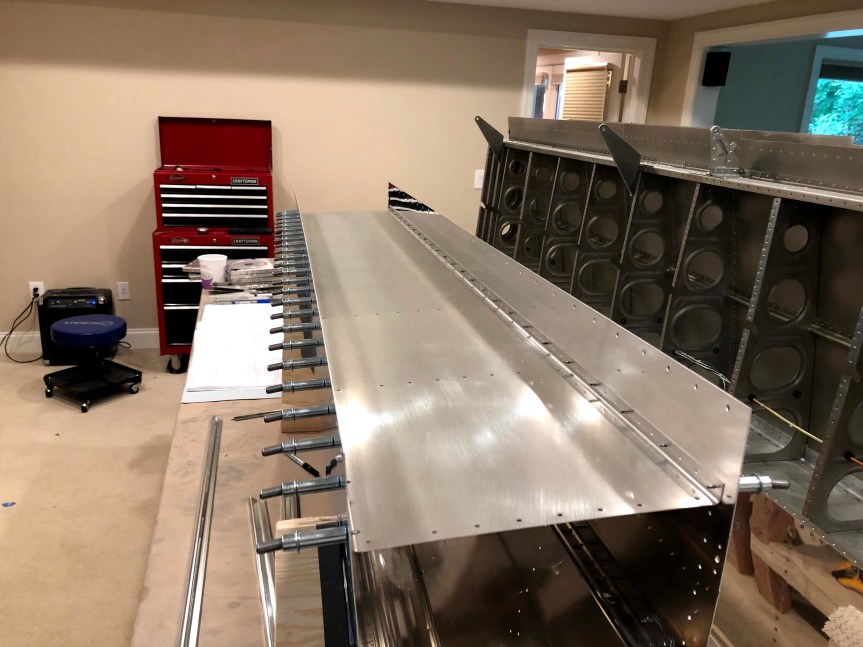
Clecoed the flaps together.


Match drilled the two top holes in each of the nose ribs. I also final drilled all of the holes in the trailing edges.

img_2693


Assembled the hardware in the hinge to hold everything in alignment and match drilled the four holes in the  trailing edge of the hinge.

img_2692

Disassembled everything.

img_2694

Next I need to machine countersink the holes in the trailing edge wedge and the holes I just drilled in the hinges. Then dimple and prime everything.

Today’s Time (hours): 6.5
Wing Time (hours): 152.5
Total Time (hours): 363.5


Began work on Flaps

Screen Shot 2019-06-01 at 5.37.36 PM

Built the cradles for the flaps. Traced a leading edge rib to make a template which I transferred to the plywood blanks. I used the bandsaw to cut out the cradles. I glued and screwed some 2×2 stock to the bottoms so I can clamp them to the bench.


Started work on the flap attach brackets. Laid out and drilled the holes in the flange of one of the left halves of the bracket. Then match drilled the other three and deburred everything. The right halves get drilled later in the process.


Today’s Time (hours): 2.0
Wing Time (hours): 146.0
Total Time (hours): 357.0


…And tanks are on hold again

Same drill as yesterday… Match drilled the right J-channel stiffener and machine countersunk the skin for the tank baffle rivets.

img_2660

Then I started dimpling the skins. I started by using the squeezer to dimple all the holes it could reach. I caught one hole off center. Then moved on the second skin. I got through the all the ones with the squeezer and then moved to the DRDT and had the skin pop off of the dimple die just as I was pulling the handle. This created an extra hole about 2 mm from the original hole. I could probably salvage both of these issues if this were a regular skin but I’d rather not chance leaky tank skins. So ordered replacements from Van’s. Not my best day of building.

The good news is I’m not stuck waiting on the replacement parts. I can move on to the flaps and/or ailerons in the meantime. Could have been worse.

Today’s Time (hours): 2.0
Wing Time (hours): 144.0
Total Time (hours): 355.0


Work resumes on the tanks

I received the J-Channel that that I ordered from Van’s. I cut it to length with a cut-off wheel in the Dremel. Then cleaned up the edges on the Scotchbrite wheel. I measured and marked the centerline. Drilled the starter hole. Clecoed it in place and match drilled the rest of the holes, clecoing as I went.


I clecoed the baffle in place and machine countersunk the corresponding rivet holes in the tank skin.


I disassembled everything final drilled the #19 holes in the skin and then deburred them as well as the holes in the j-channel. I dimpled the J-channel with the pneumatic squeezer.

In other news… My propeller was delivered! It’ll be a while before I need it but ordered it at the same time as the engine to get a discount. The engine has a much longer lead time. Expecting it to show up mid October.


Today’s Time (hours): 2.0
Wing Time (hours): 142.0
Total Time (hours): 353.0


Completed systems routing

Screen Shot 2019-05-27 at 10.23.29 AM

Wired the right wing for the nav, strobe, and landing lights. Also ran the wires for the autopilot servo.


In the left wing I ran the wiring for the nav, strobe, and landing lights. I also ran the wiring for the ADAHRS and the plastic line for the pitot tube. Decided to drill a couple of extra routing hole in order to mount the pitot tube outboard of the aileron bellcrank in order to avoid interference with the aileron push tube. I omitted the wire for the stall warning system since I didn’t install it in the leading edge. The Garmin system has an AOA sensor as part of the pitot system. So no need.


Today’s Time (hours): 3.0
Wing Time (hours): 140.0
Total Time (hours): 351.0


Installed landing lights and lenses

Cut the plexiglass lens to 3/4″ larger than the opening in the wing using the Dremel with a diamond dust blade. Cut like buttah.

img_2618

Covered the lens with tape to protect it. Put in in place within the wing and traced the opening onto the tape. I lined up the backing places and marked the tape with the finished cut lines. I cut to final size with the Dremel and sanded the edges smooth with a sanding drum in the drill press.

img_2619

Set the lens into place and used the tape “leash” i made on the front of the lens to pull it tight against the inside of the skin. Drilled and clecoed all th holes with a #30 plexi bit.

img_2620

Remove the lens from the wing and removed the tape. I countersunk the holes with 100 degree zero-flute countersink bit in the electric drill. I deburred the back side of the holes with a single turn of the same bit.

img_2621

I used VHB double stick tape to secure the backing plates to the lens.

img_2622

I installed the landing light onto the bracket that I had riveted into the wing in an earlier step.

img_2624

I secured the lens in place with #6 stainless screws.

img_2627

And then repeated the whole process for the right wing.

img_2628

This completes section 17–Outboard leading edges!

Today’s Time (hours): 4.0
Wing Time (hours): 137.0
Total Time (hours): 348.0


Primed all the tank parts.

When I bought my tools I bought my tools for this project, I decided to buy a DRDT-2 dimpler. I decided not to bother with a c-frame. Until this point I have not found anything that I couldn’t do without a c-frame. Today I needed to fill the locating holes in the inboard and outboard ribs with AN470AD6-5 rivets. I don’t own any tool capable of setting those big rivets reliably. Fortunately Jared offered up his c-frame and I went to his house and got these rivets set. Thanks, man! Ended up cutting the rivets down to like a 6-3. They are not structural and they were way to long.  They just plug up the machining holes in the external fuel tank ribs. The shorter rivets set perfectly with the c-frame and a heavy hammer.

img_2617

I primed the exterior side of all the fuel tank parts.

img_2612

I riveted the bearings for the aileron controls to the tank attach bracket.

img_2613

I riveted the shims and nutplates to the tank attach brackets.

img_2615

I riveted the nutplates to the aft inboard ribs. I couldn’t get a mushroom set in between the clecos to rivet these. So I used a back rivet set on the tail and a bucking bar on the factory head.

img_2616

I’ve completed everything I can on the Tanks until I get the J-Channel I ordered from Van’s. On the bright side… I received the tools I need to install the landing light lenses so that will be tomorrow’s project.

Today’s Time (hours): 3.0
Wing Time (hours): 133.0
Total Time (hours): 344.0


Work continues on Fuel Tanks

Final drilled the tank attach Z brackets and machine countersunk the nutplate attach holes. I cut the brackets apart on the band saw and cleaned up all the edges on the scotchbright wheel. I riveted the nutplates in place with the squeezer.


I machine countersunk the fuel filler flanges.


I separated the shims with snips and deburred on the scotch bright wheel. I clecoed the the shims to the tank attach brackets and trimmed the ends to be flush with the brackets with snips and cleaned up the edges on the scotchbright wheel. I final drilled all the holes in the shims and dimpled them with the squeezer. I machine countersunk all the holes in the flanges of the attach brackets.


I came up short on J-channel. Not sure whether I didn’t cut the stock I had efficiently when making up the wing stiffeners or if I missed something in inventory. Either way I don’t have anything long enough to make the two 54″ tank stiffeners. I ordered a couple more pieces from Van’s. Should be here next week some time.


Today’s Time (hours): 3.0
Wing Time (hours): 130.0
Total Time (hours): 341.0


Prepared tank stiffeners

Dimpled the nut plate attach holes in the inboard tank ribs.

img_2588

Separated the stiffeners.

img_2592

Used snips to make all the cuts. Doh! Should have peeled the blue vinyl off before I cut them.

img_2593

Then cleaned them up on the scotch bright wheel, scuffed the mating surfaces and dimpled.

img_2595


Today’s Time (hours): 2.0
Wing Time (hours): 127.0
Total Time (hours): 338.0


Started work on fuel tanks

Screen Shot 2019-05-21 at 9.57.47 PM

I ordered plexi bits and a zero flute countersink so that I can fabricate the landing light lenses. While I’m waiting for those to show up, I started on the tanks.

Fluted and straightened the tank ribs yesterday. Final drilled all the #40 and #30 holes in all the ribs tonight.

Located and drilled the 3/4″ hole specified in the plans.

img_2583

Match drilled the rivet holes from the finger strainer flange in the inboard ribs.

img_2584

Dimpled all the holes in the top and bottom flanges of all the ribs.


Today’s Time (hours): 2.0
Wing Time (hours): 125.0
Total Time (hours): 336.0