Dimpled all the ribs and stiffeners

Got my rivet set and AD5 rivets from spruce and replaced the rivets I removed after screwing up last week. See Finished riveting everything to the rear spars… almost.

img_2397

Dimpled all the ribs in both wings…


…and the J-channel stiffeners

img_2400

Today’s Time (hours): 1.5
Wing Time (hours): 75.5
Total Time (hours): 286.5

Riveted rear spars to ribs

Riveted the rear spars to the wing ribs. I tried to use the squeezer but it was cumbersome with several different rivet sizes and with the flanges in the way. So I switched to the gun. This was much easier.

img_2382


And of course, no section is complete without a few mistakes. I used the wrong size rivets in ribs behind the doublers. I used 4-4’s and needed 4-5’s the shop heads were too thin to be acceptable. So I drilled them all out. Nine rivets in total. I couldn’t punch the rivets out because there was nothing to back them up when I hit them with the punch. So I had to drill them all the way out. I was super careful but the holes are enlarged ever so slightly. If this wasn’t a critical structure, I’d probably just re-rivet it but this area carries the load from the ailerons and flaps. So I’ll go with a larger river to ensure structural soundness. I order some -5 rivets, a #21 drill, and a 5/32″ rivet set from Spruce.

img_2383


I also put in an order with Van’s for some fuel tank sealant.


Today’s Time (hours): 2.0
Wing Time (hours): 69.0
Total Time (hours): 280.0

Fixed the right aileron hinge and riveted to rear spar

Did some flying with Jared today in his RV-14A. Awesome day dancing around some scattered clouds and some fun aerobatics. Thanks for the great flight today, Jared! The aerobatic training is definitely paying off. Sorry no pics. I was having too much fun!

Meanwhile back at the airplane factory…

Received the replacement parts from vans and did the little bit of fabrication necessary to prepare the doublers and attach brackets.

img_2369

Deburred and primed the new parts with SEM rattle can primer. Riveted the attach brackets to the hinge.

img_2372


Riveted the hinge and doublers to the right rear spar.

img_2373


The mistake cost me $45 in parts and an hour and a half of build time.

img_2376


Got my new 3/8″ reamer from McMaster Carr. Used it in the drill press to precisely size the rear spar attach holes. The twisted flutes cut like butter.

img_2380


Clecoed the rear spars to the wing ribs. Ready to rivet tomorrow.

img_2381


Today’s Time (hours): 2.0
Wing Time (hours): 67.0
Total Time (hours): 278.0

Finished riveting everything to the rear spars… almost.

Finished riveting all the stuff to the spars…

img_2361

I really struggled riveting the aileron hinge brackets to the spar. Couldn’t get the squeezer in there. My rivet set wasn’t long enough to clear the bracket. So I had to use the offset rivet set. But that one is thicker and interfered with the bracket rivets. Mangled a bunch of rivets and drilled them out. Ended up mangling the bracket and bending the doubler drilling out one of them. Thankfully the spar was undamaged.

img_2355

I drilled out all the rivets and disassembled the brackets and doublers. The hinge is fine. Emailed Van’s to send me a new doubler and angle bracket.

img_2357.jpg

On the other wing I had the brilliant idea to try shooting the rivets for the hinge bracket from the other side of the spar. This worked a lot better.

img_2359

Should have replacement parts by next weekend when I get back from Florida.

Today’s Time (hours): 2.0
Wing Time (hours): 65.0
Total Time (hours): 276.0

Attached right elevator tip

Same drill as as the left tip… Final drilled #30, remove counterweights, dimple reinstall and torque counterweights, countersink tip, cleco, and pop rivet.

img_2078

Tada

img_2079

I used this bit on the Dremel to cut some fiberglass and phone out of the middle of the HS tip to correct the fitting issue I mentioned yesterday. Not a precision instrument. At least not in my hands. But it got the job done.

img_2073

I added a temporary foam block to hold the correct width.

img_2074

I used some masking tape to compress to the correct width. And adjusted to an interference fit with the HS skin.

img_2076

Cut some cloth to fit the inside of the tip.

img_2075

Added epoxy and set aside to cure. Once it’s hard, I’ll remove the temporary foam spacer and backfill the gap I cut with micro at the same time I fill the front side.

img_2077


Today’s Time (hours): 2.0
Empennage Time (hours): 203.0
Total Time (hours): 203.0


Attached left elevator tip

I final drilled #30 the elevator skin to the tip. Then I removed the tip and countersunk the holes.

img_2068

I dimpled the holes in the elevator.

img_2069

I had to remove the counterweight to dimple the forward two holes. Then reinstalled and re-torqued the nuts.

img_2070

Installed the tip with CS4 pop rivets. I’m thinking I might replace my pop rivet tool. I’m getting a burr on the top of all of the rivets and I’ve had several break off in the tool. I’m careful to keep the tool perpendicular to the work but this keeps happening. A while back, a mandrel got jammed in the tool. I disassembled it to remove the mandrel and reassembled it. But I think the jaws are not grabbing properly now.

img_2072

In other news, you can see that after trimming and sanding the left HS tip, it fits nicely. The right tip is another story. I think I neglected to final fit it after I sanded the foam or perhaps I seated the foam too deeply. In any event, it spread the tip about an eighth too far and now the tip wont fit between the top and bottom skins at the spar. I’ll noodle on how I might salvage the part for a while and If I can’t I’ll order a new one. My best thought at this point is to take a 1/8″ wedge out of the middle of the foam/fiberglass with a saw and then put  another layer of glass over it.


Today’s Time (hours): 1.0
Empennage Time (hours): 201.0
Total Time (hours): 201.0


Dimpled top side skins and aft deck

Dimpled the top side skins. I used the squeezer for most of the holes and the DRDT-2 for the ones the squeezer couldn’t reach.

IMG_1998-1

I clecoed the side skin on. And I actually remembered to peel the rivet lines this time.

IMG_1995-1

I dimpled the F-01409 frame.

IMG_1996-1

And the aft deck.

IMG_1997-1

I clecoed the aft deck, F-01409 frame in place along with the Horizontal Stab Attach Bar Support Angle and deck angle. I clamped the attach bar to the support angle and match drilled. I also match drilled the deck angle to the aft bulkhead.

IMG_1999

I dimpled the cover plates for #6 screws as well. Then I realized for the first time that the cover plates are not symmetrical. <moan> And of course one is now dimpled the wrong way and primed on the wrong side. I went to order a new one from Van’s web site only to find that F-14112 does not exist in their parts inventory and it’s an hour after closing time. Oh well. I’ll call the tomorrow. No big rush given that I’m almost out of parts and my wing kit isn’t scheduled to ship for more than a month.

IMG_2002

Today’s Time (hours): 2.5
Empennage Time (hours): 177.0
Total Time (hours): 177.0


Whole lotta scuffin’

I cut the aft tail skin with the snips. Cutting .040 aluminum with snips is a workout. I thought of using the band saw but it’s an awkward part to cut straight with the saw. I trusted my skills with the snips more than steadiness of my hand at the band saw. Good result but my forearm was pretty sore afterward.

IMG_1910

Cleaned it up with file and sand paper.

IMG_1913

My paint cutter arbor arrived from Aircraft Spruce. So I was able to cut the remaining countersinks in the rudder stops without the cage.

IMG_1914

I was skeptical that I’d be able to hit the right depth free hand but it worked out fine.

IMG_1915

I also heard back from Van’s support on the holes that I thought shouldn’t be dimpled and in fact they shouldn’t have. So I hammered them flat. This was definitely an error in the plans. Now my tie down bracket sits flush.

IMG_1917

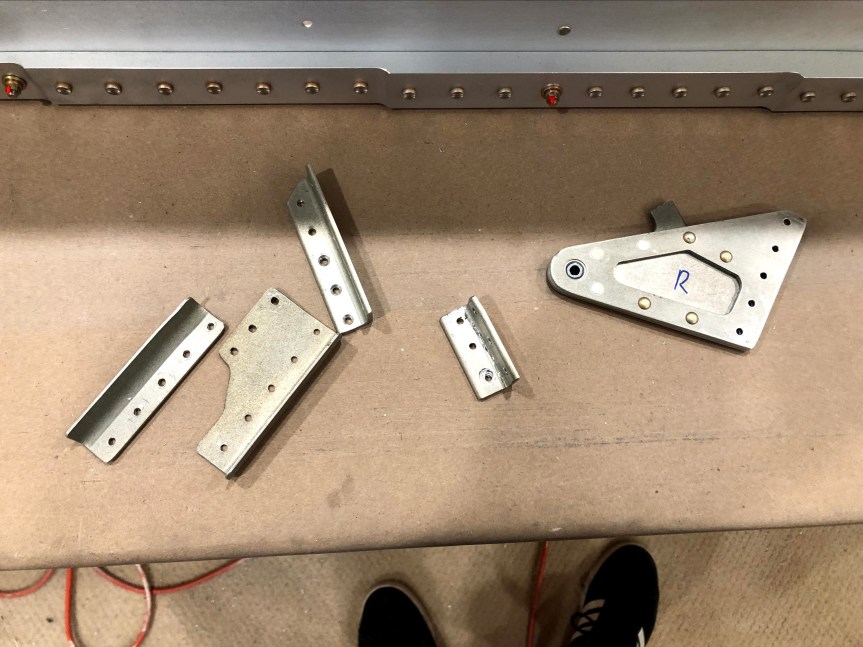
And finished up with a marathon scuffing session.

IMG_1921

I’ve got to be honest. Scuffing parts is my least favorite part of the process. It’s dusty messy work.

IMG_1918

That was a lot of parts to scuff but I’m glad I fought through and got them done. This is most of the parts for the tail cone. Once these are primed, I’ll only have the skins and a few small parts left to scuff and prime in order to complete the empennage. Big priming session tomorrow. Then I can start assembling. 🙂

Today’s Time (hours): 3.0
Empennage Time (hours): 144.0
Total Time (hours): 144.0


More work on bulkheads

Modified the bottom of the 1408 bulkhead.

IMG_1893

Deburred and dimpled all the 1407 and 1408 bulkhead parts.

IMG_1895

Separated, deburred, and dimpled the bell crank ribs.

IMG_1896

I realized when I went to drill the battery angles that I somehow modified the wrong one. I could swear that I marked these parts carefully before I separated them but it appears I switched the A and B markings. I don’t think this will be a problem though. I just needed to modify the correct one. The modification to the wrong one is not consequential.

IMG_1897

Once I fixed that, I drilled and countersunk all the nut plate holes and match drilled the angles to the bell crank ribs. I deburred and dimpled the 1406 bulkhead as well.

IMG_1898

I think next weekend I’m going to have two solid days of scuffing and priming all these parts.


Today’s Time (hours): 4.0
Empennage Time (hours): 141.0
Total Time (hours): 141.0


Four out of Five Ain’t Bad

My new molex crimper arrived from amazon along with the new automatic wire stripper. Yay! New tools.

These Molex MicroFit  pins are teeny tiny. I managed to crimp four out of the five pins on to the wires from the trim servo correctly. Unfortunately there was only one extra pin provided and I already burned through that one on my first attempt. So I ordered a bunch of  extra molex pins and housings.

IMG_1856

Today’s Time (hours): 0.5
Empennage Time (hours): 126.0
Total Time (hours): 126.0